Python Virtual Environments with venv
See Python: Tips and Tricks for similar articles.
In this tutorial, we will be running some commands at the prompt. The prompt text varies by operating system, terminal type, and settings.
We will be using a $. Your prompt text will likely be different.
$ sample command
A virtual environment is a self-contained directory tree that contains a Python interpreter and all the additional non-standard Python packages and modules required for your project.
The major advantage of using virtual environments is that you can set up each project with the specific packages and modules it requires. Another big advantage is that you can easily share that setup with other developers so they can quickly make exact copies of the development environment of your project.
For this tutorial, we are assuming you’re using Visual Studio Code, but you should be able to follow along with any IDE (or no IDE at all).
Create the Virtual Environment
- Create a new folder to host your project. Give it a name that makes sense for your project.
- Open Visual Studio Code and open the folder you just created.
- Open a terminal by selecting Terminal > New Terminal or pressing Ctrl + `.
- At the terminal, run the following command:
$ python -m venv .venv
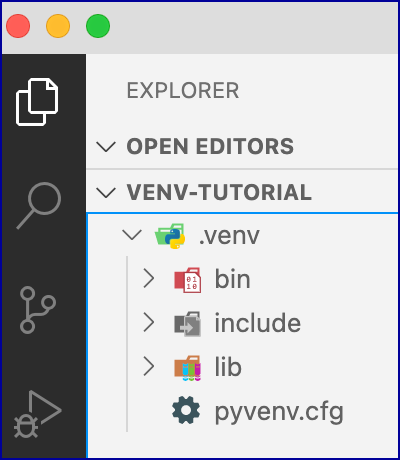
You can name this directory whatever want, but it is commonly called “.venv” (notice the prepended dot) to indicate that it is a special directory for holding a virtual environment. This will create and populate a new .venv directory. The contents of that directory will differ by operating system:Windows
- .venv
- Include
- Lib
- Scripts – Contains the Python executable.
- pyvenv.cfg
Mac
- .venv
- bin – Contains the Python executable.
- include
- lib
- pyvenv.cfg
- .venv
- To work within your virtual environment, you must first activate it. The command for activating a virtual environment
varies by operating system. Run one of the following:
Windows
$ .venv/Scripts/activate
Mac
$ source .venv/bin/activate
- When the virtual environment is activated, its name will always appear enclosed in parentheses before the prompt:
(.venv) $
If you don’t see the virtual environment name in parentheses before the prompt, you are not in the virtual environment. - You can now invoke the Python interpreter and/or install additional packages (using
pip) within the virtual environment. Because the$PATHenvironment variable is modified when a virtual enviroment is activated, the executable files are resolved within the virtual environment. Let’s take a look at the value of this environment variable. Run the following command for your environment:Windows: PowerShell
$ $Env:PATH
Windows: Command Prompt
$ echo %PATH%
Mac / Linux
$ echo $PATH
You should see the path of the Scripts (Windows) or bin (Mac) directory prepended to the list of paths:(.venv) $ $Env:PATH C:\Webucator\tutorials\.venv\Scripts;C:…
Because it is at the beginning of$PATH, the Scripts or bin directory will be scanned first to resolve references to executable files. Once you deactivate the virtual environment, the Scripts and bin directory will be removed from$PATH. - Now, you can install any packages or modules you need for your project. For example, if you want to install Django, just run:
(.venv) $ pip install django
After it finishes installing, you will see Django, along with some of its dependencies, listed in the .venv/lib directory:- .venv
- lib
- __pycache__
- asgiref
- asgiref-3.3.4.dist-info
- django
- Django-3.2.1.dist-info
- pip
- …
- lib
- .venv
- To deactivate (exit) the virtual environment, run:
(.venv) $ deactivate
Now, you are back in the original prompt. - When you no longer need a virtual environment, you can delete it by using operating system commands to delete the folder (e.g., .venv) that was automatically built when you created the virtual environment.
