How to Install and Use Visual Studio Code for Class
Visual Studio Code is an excellent IDE to use when learning to develop web sites. It provides a nice balance of power and simplicity and it is available on Windows and Mac.
Follow these instructions to set up Visual Studio Code for your course.
- Download Visual Studio Code for your operating system.
- Install Visual Studio Code.
- Instructions for Windows. Use the installer for Windows.
- Instructions for Mac.
- Open Visual Studio Code.
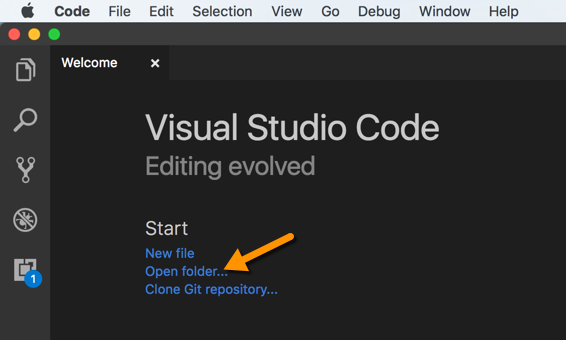
- On the Welcome Screen, under Start, click the Open Folder... link.
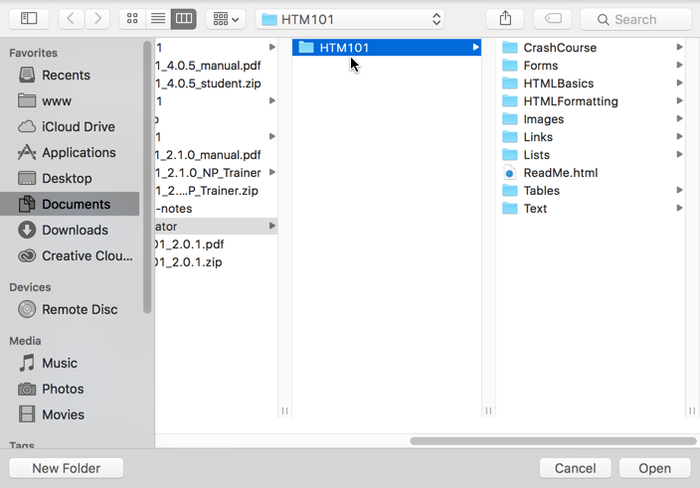
- Navigate to the folder in which you installed your Webucator class files and open the folder (note that the folder name might be different than shown below):
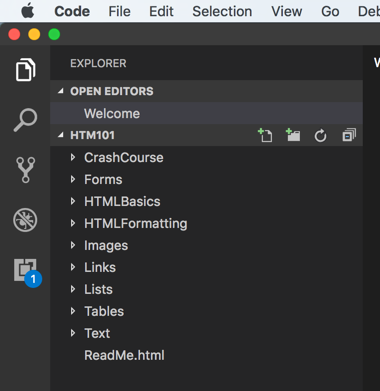
- You will see the class files (names might be different than shown below) listed in Visual Studio Code's Explorer:
- To open a file for editing, navigate to the file and double click it. It will open in a tab and appear under OPEN EDITORS. The tab will remain open until you explicitly close it.
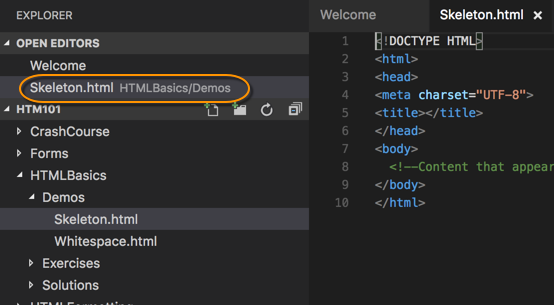
- To quickly view a file, just single click it. It will open in a tab and appear under OPEN EDITORS in italics and will only stay there until you view or open another file. However, if you make a change to the file, it will remain open until you explicitly close it.
There is a lot more to Visual Studio Code, but this is all you need to know to get started. Have fun!
Related Articles
- HTML Heading Levels and Sectioning Content
- How to Ask Good Technical Questions
- How to Install and Use Visual Studio Code for Class (this article)
- How to Open HTML Files in Your Browser from Visual Studio Code
- How to Force a Refresh of favicon.ico
