Getting Oracle’s HR Schema
See Oracle: Tips and Tricks for similar articles.
In this article, I’ll walk you through installing Oracle’s demo HR schema, which is used in Oracle tutorials, documentation, and in Webucator’s Oracle courses. I’ll also show you how to connect to the schema with SQL Developer.
We will assume you’re using Oracle XE on localhost. If that’s not the case, your hostname and service name will be different.
You should have Oracle and SQL Developer already installed. If you don’t, see How to Install Oracle Express Edition and SQL Developer.
Instructions
- Go to https://github.com/connormcd/misc-scripts/blob/master/hr_quick_start.sql
- Right-click the Raw link:
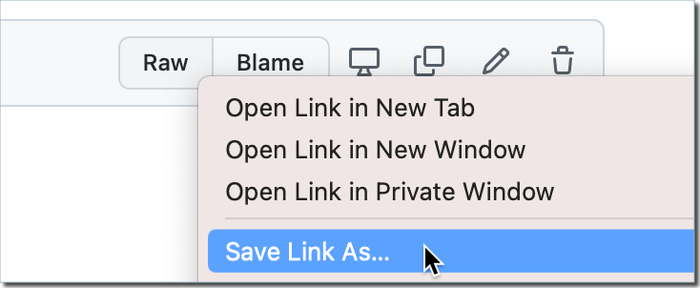
- Save the file to an easy location to remember (e.g., the root of your C drive.
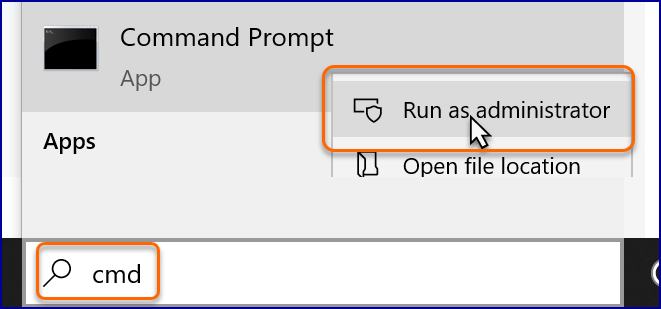
- Run the Command Prompt as administrator:
- Run the following commands:
- Change directory to the folder in which you save hr_quick_start.sql (e.g., \):
cd \ - Log into SQL*Plus as system using your system password:
You should get asqlplus system/password@//localhost/XEPDB1SQLprompt:
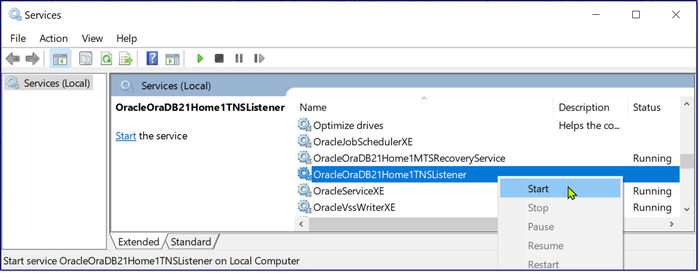
If you get either of the following errors, open Services and start (or restart) both of the following services:SQL>- OracleOraDB21Home1TNSListener
- OracleServiceXE
- Change directory to the folder in which you save hr_quick_start.sql (e.g., \):
- Create and populate the HR Schema by running the hr_quick_start.sql script:
Follow the instructions, pressing Enter when prompted. IMPORTANT: Be sure to note your password when prompted. You should see a lot of messages. The final message should be:SQL> @hr_quick_start.sql**** INSTALLATION COMPLETE **** - To confirm the installation actually did complete, run the following query:
You should get the following results:SQL> SELECT * FROM Regions;REGION_ID REGION_NAME ---------- ------------------------- 1 Europe 2 Americas 3 Asia 4 Middle East and Africa 4 rows selected.
Connect to the HR Schema from SQL Developer
- Open SQL Developer.
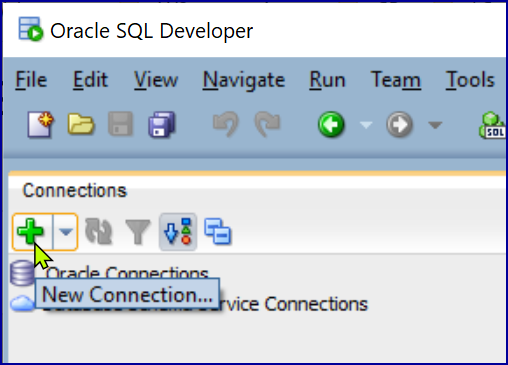
- Click the + icon under Connections:
- Enter the following:
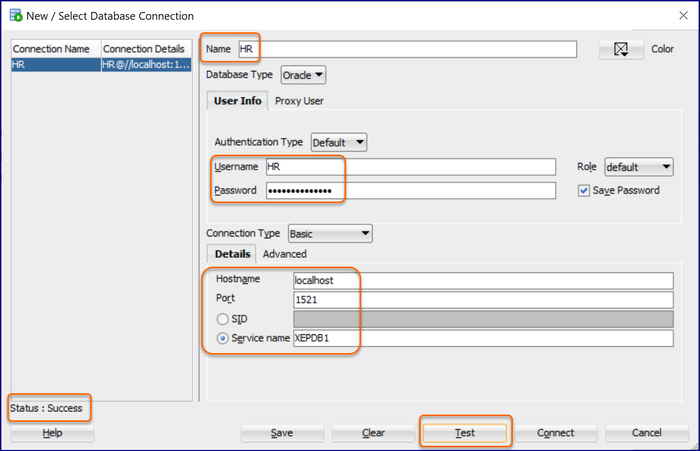
- Name: HR
- Username: HR
- Password: Enter the password you noted when running hr_quick_start.sql.
- Hostname: localhost
- Port: 1521
- Service Name: XEPDB1
- Click Connect.
- Close the dialog.
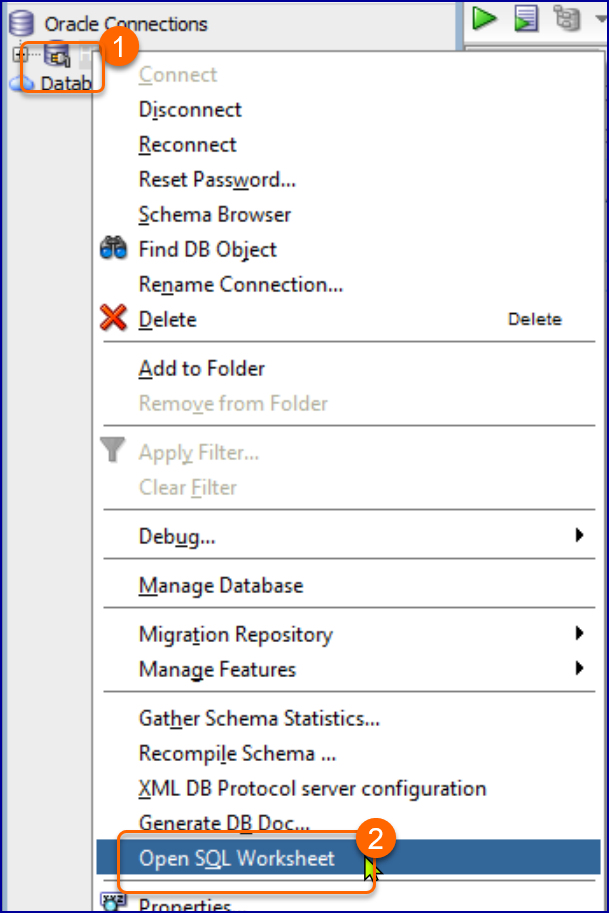
- Open a blank SQL Worksheet by right-clicking HR under Connections and selecting Open SQL Worksheet:
- Enter the following SQL query in the new worksheet:
SELECT * FROM Regions; - Run the query by clicking on the left green triangle. You should get 4 rows in the Query Result:
 If the query worked, you are all set.
Installing the HR Schema in the CDB
Be warned!
The instructions below show how to install the HR schema in the root (i.e, the CDB or container database). As a rule, you don’t want to do this. Rather, you want to install all your schemas in PDBs (pluggable databases). Historically, this was tricky to do, so we used the CDB method as a simpler way of getting students set up to learn SQL and PL/SQL. But the one-and-done script for installing the HR schema has simplified things, so the below is no longer necessary. I’m keeping the documentation in case anyone runs into issues with the run-and-done script and just needs to get the HR database in place, so they can start learning SQL.
If your main purpose is to learn/practice SQL and PL/SQL, the method below is fine. It won’t hurt anything. It’s just not the recommended way of doing things.
There are two pieces involved:
- Setting up the HR Account.
- Getting the HR Schema.
For an overview of the HR schema, see Oracle’s Demo HR Schema.
Set Up the HR Account
- In SQL Developer, add a new connection:
- Click the + icon under Connections:
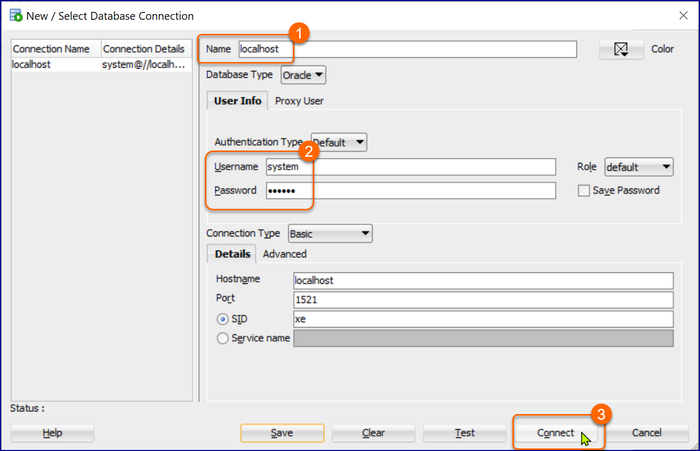
- Enter “HR” as the Name and “system” for both the Username and Password,
and click Connect:
- Close the dialog.
- Click the + icon under Connections:
- Open a blank SQL Worksheet by right-clicking HR under Connections and selecting Open SQL Worksheet:
- Enter the following code:
DROP USER C##HR CASCADE; CREATE USER C##HR IDENTIFIED BY HR DEFAULT TABLESPACE USERS TEMPORARY TABLESPACE TEMP ACCOUNT UNLOCK; ALTER USER C##HR ACCOUNT UNLOCK; ALTER USER C##HR QUOTA UNLIMITED ON USERS; GRANT CONNECT, RESOURCE, CREATE VIEW TO C##HR; - Select HR from the connection dropdown in the upper right:
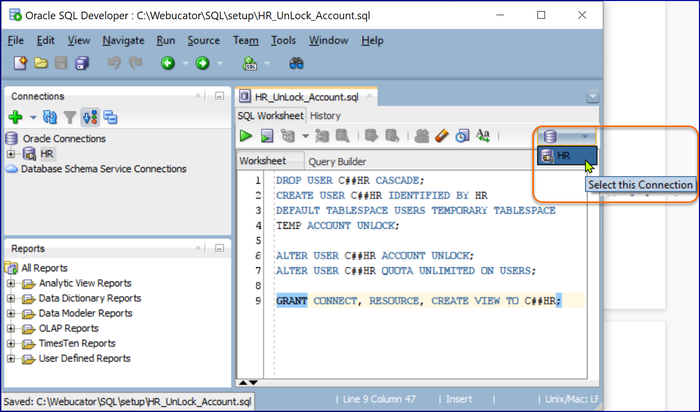
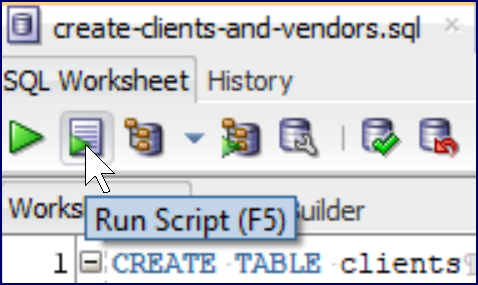
- Click the second green play button to run the script.
This will create the HR user and assign it the appropriate privileges:
Get the HR Schema
- Go to https://github.com/oracle/db-sample-schemas/releases/latest and download the Source code (zip) to get the sample schemas.
- Unzip the sample schemas to the root of you C drive). That will create a C:\db-sample-schemas-21.1 folder.
- Run the Command Prompt as administrator:
- Run the following commands:
- Change directory to the human_resources folder within the db-sample-schemas folder:
cd \db-sample-schemas-21.1\human_resources - Start SQL*Plus as the HR user:
sqlplus C##HR/HR
- Change directory to the human_resources folder within the db-sample-schemas folder:
- Create and populate the HR Schema by running the following two commands:
SQL> @hr_cre.sql
You should see a lot of messages. The final message should be:SQL> @hr_popul.sqlCommit complete. - Open SQL Developer and open the properties of the HR connection by right-clicking it and selecting Properties:
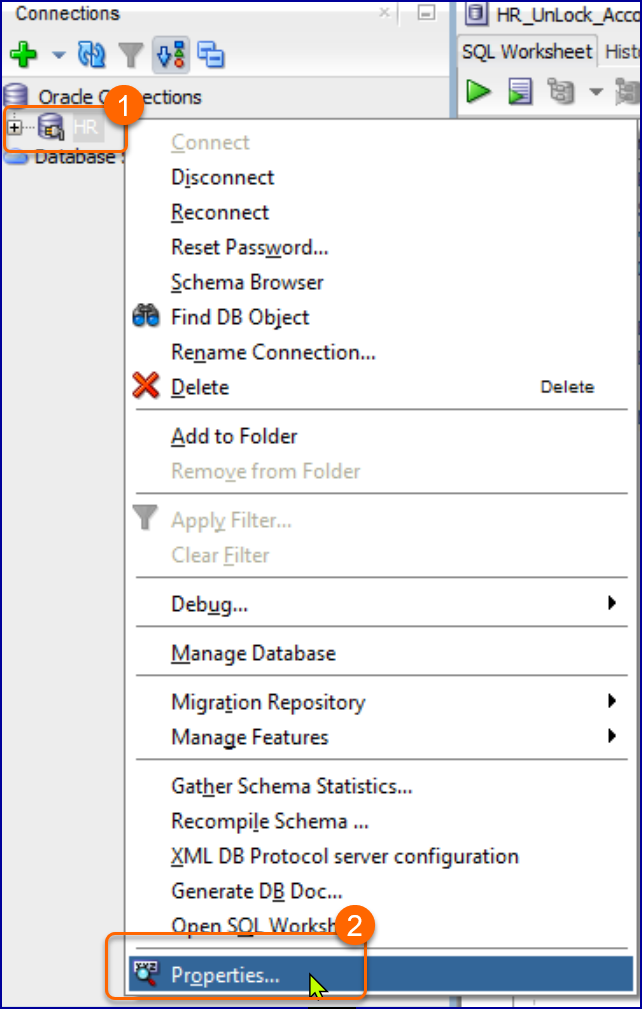
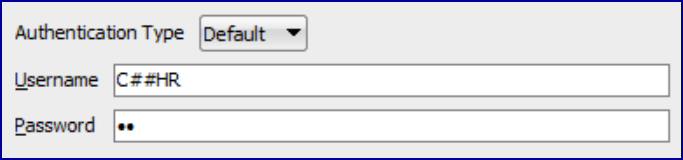
- Change the username from “system” to “C##HR” and change to password to “HR”:
- Open a blank SQL Worksheet by right-clicking HR under Connections and selecting Open SQL Worksheet:
- Enter the following SQL query in the new worksheet:
SQL> SELECT * FROM Regions; - Run the query by clicking on the left green triangle. You should get 4 rows in the Query Result:
If the query worked, you are all set.
