Connecting Django and Vue
In this article, we will walk through creating a Django project and integrating Vue.
Why Django?
Django is a powerful Python web framework that can be used to easily build clean, scalable, and secure web apps. Django’s tagline “The web framework for perfectionists with deadlines” gets at its goal to help developers build great web apps quickly. This makes Django a great choice, especially for Python developers, for building any size web application.
According to the Python Developer’s 2021 Survey, Django is the second most popular Python framework just behind Flask. Django is also the ninth most commonly used web framework overall and the most commonly used open-source server-side web framework (just ahead of Flask).
While Django is an incredibly powerful framework for building out your web app, it is used for server-side/backend programming, meaning that any dynamic changes won’t be shown on the browser until the user refreshes the page. This issue can be resolved by partnering with a client-side web framework like React or Vue.
Why Vue?
Vue is a fast and reliable JavaScript framework for building dynamic web user interfaces.
Vue is the sixth most popular web framework, has over 1.5 million users worldwide, and is used by organizations like Apple, Zoom, Google, and Microsoft.
Combining Vue with Django allows you to take advantage of the scalability and security of Django on the backend while still getting speed and reliability on the frontend.
Now, that we know why we are using Django and Vue, let’s get started:
Creating the Django Project
Visual Studio Code is my editor of choice, so I’ll open the folder where I want to create my new project. I’ve named it django-vue.
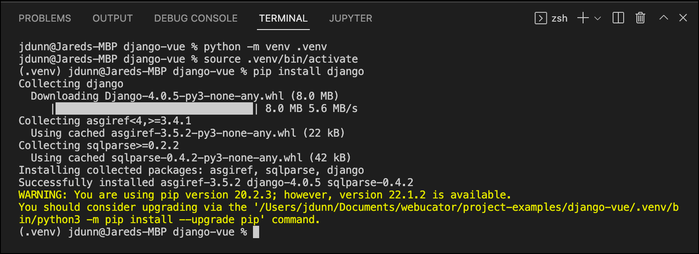
Now, I will create a Python virtual environment and install Django:
- Open the Integrated Terminal in Visual Studio Code.
- Run
python -m venv .venvto create the virtual environment. - Run
source .venv/bin/activate(Mac) or.\venv\Scripts\activate(Windows) to start the virtual environment. - Run
pip install djangoto install Django.
Now, I can create my Django project by running:
django-admin startproject project_name .
I’ll name my project djangovue_project. 
The dot (.) at the end of django-admin startproject project_name . indicates that the project should be created in the current directory. If you leave it off, a new project directory will be created with a nested folder that has the same name, which can be confusing.
My folder structure now looks like this: 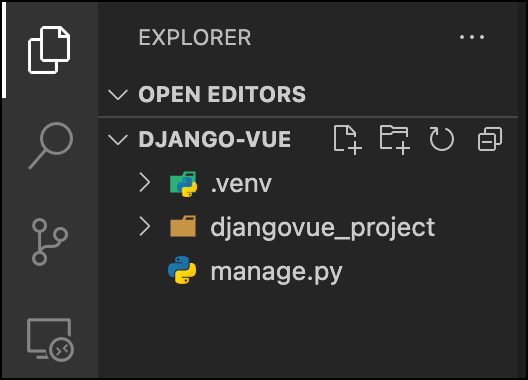
At this stage, you can run your Django project with python manage.py runserver: 
Navigate to http://127.0.0.1:8000/ to see your project in the browser! 
Creating a Django App
Let’s now create a simple games app, which will allow users to play different games and record scores.
- To create a new app, run
python manage.py startapp app_name:
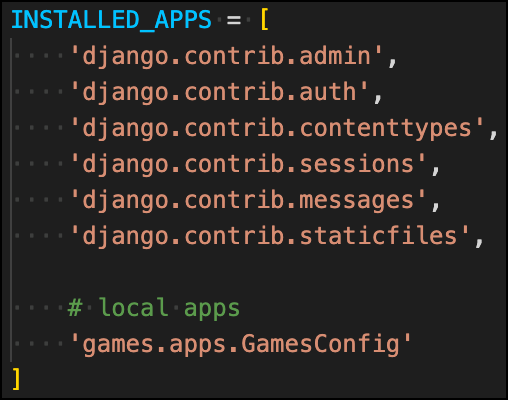
- Now, we need to add our new app to the installed apps in Django:
Configuring Views, URLs, and Templates
In order for our app to have actual pages that can be seen in the browser we need to configure Django views, urls, and templates.
Views
Let’s configure a few different views for our games app:
- Open games/views.py.
- Import
TemplateViewfrom django.views.generic and create three new views: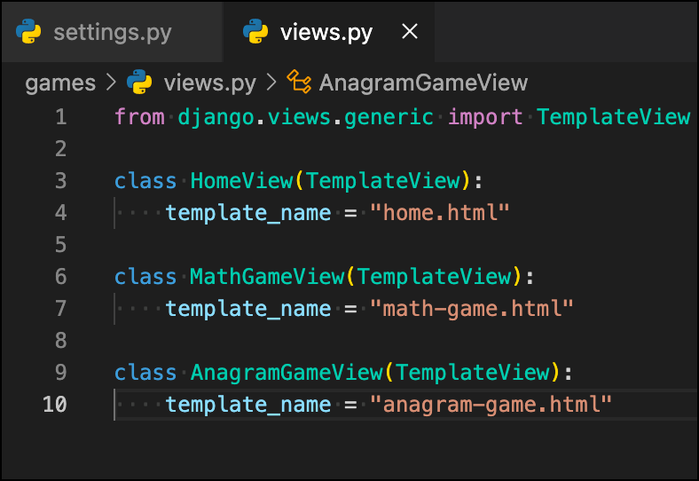 These views will be for a homepage, a page to play a math game, and a page to play an anagram game.
URLs
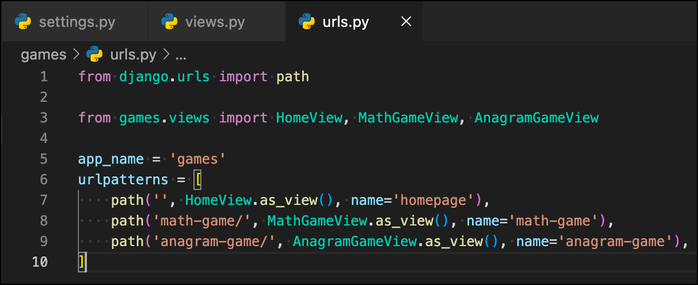
Let’s configure our URLs for the games app:
- Create a file called urls.py inside of the games folder.
- Add the following code to create url paths for each of our views:
- Open djangovue_project/urls.py.
- Import
includefromdjango.urlsand add the games urls to project urls: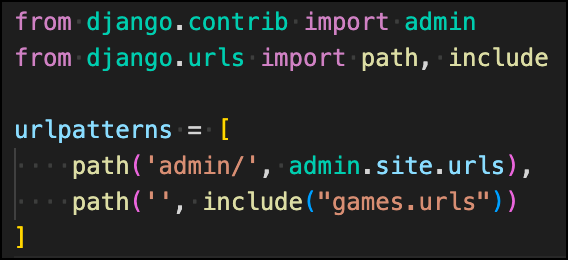
Templates
After we configure templates, we will be all set to view our pages in the browser!
- Create a folder called templates inside of the django-vue folder at the same level as games.
- Open up djangovue_project/settings.py and update
TEMPLATESso that Django looks for templates in your new templates folder: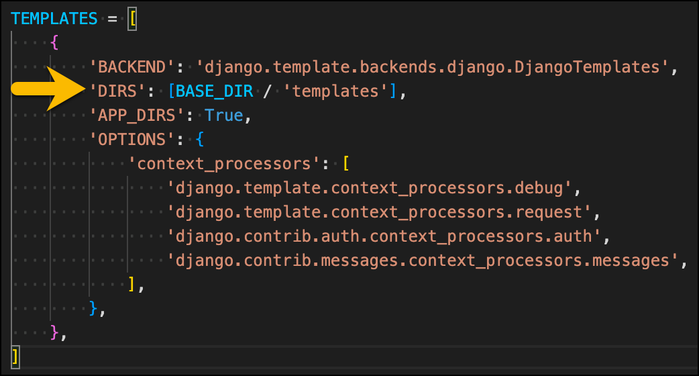
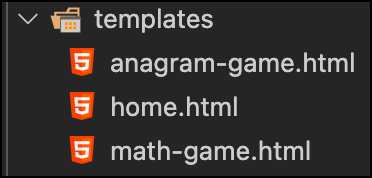
- Add the three files we designated as template names (home.html, math-game.html, and anagram-game.html):
- Now add the following simple HTML to each template where [Page Name] is “Home”, “Math Game”, or “Anagram Game”
<!DOCTYPE html>
<html lang="en">
<head>
<meta charset="UTF-8">
<meta name="viewport" content="width=device-width, initial-scale=1">
<title>[Page Name]</title>
</head>
<body>
  <h1>[Page Name]</h1>
</body>
</html>
To see these pages, run the server and go to:
Template Improvements
We had to repeat that same skeleton code for each of our templates. Let’s take advantage of Django’s template inheritance and build a base template that can be extended by each of our other pages:
- Create a new file in the templates folder called _base.html.
- Add the following code:
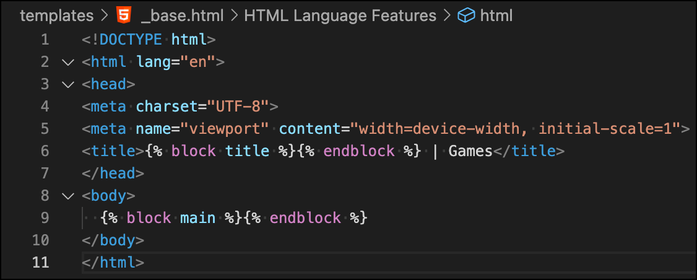
{% block title %}{% endblock %}and{% block main %}{% endblock %}represent the places where we will add our page-specific content. For example, home.html could now look like: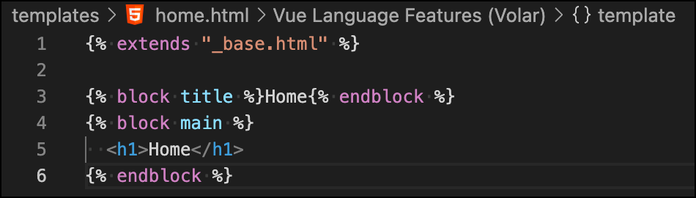
- Do the same for math-game.html and anagram-game.html.
We can make an additional improvement to our _base.html template by adding header navigation so that all of our pages have links to each other:
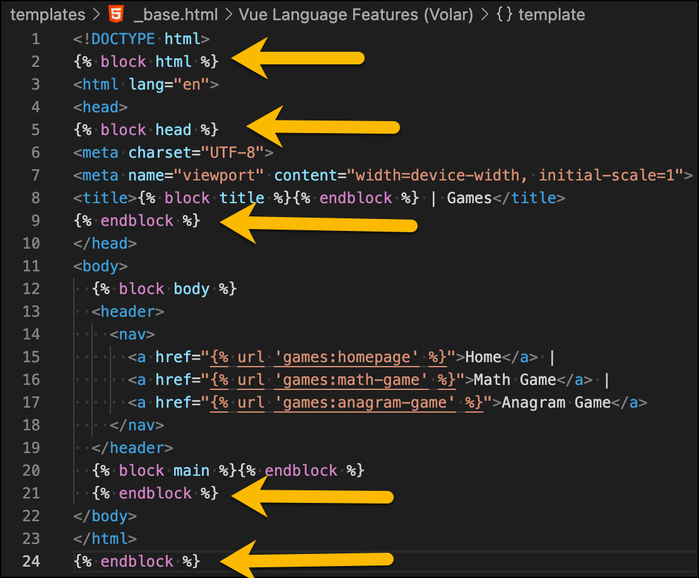
- Open templates/_base.html.
- Add a header with navigation using the built-in Django url tag:
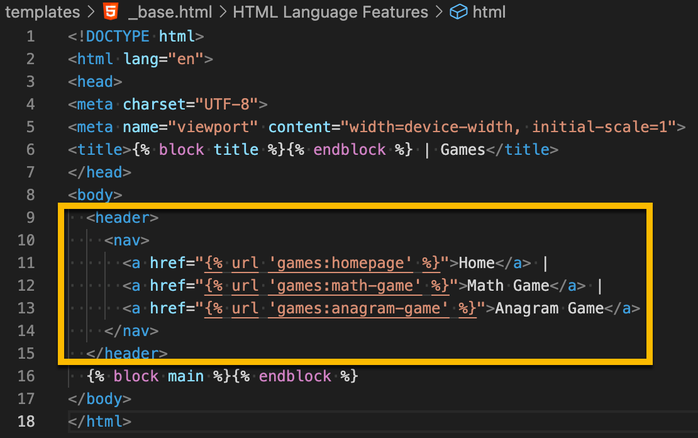
The built-in Django url tag will get the url path for you by interpreting Django urls. The syntax is:
{% url 'namespace:url-pattern-name' %}
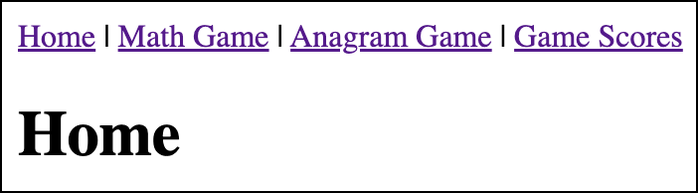
Now, all of our pages that extend the base template have navigation! 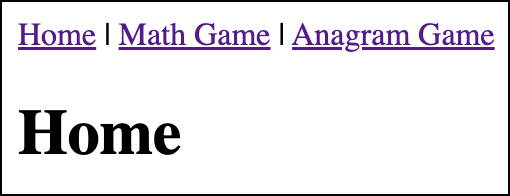
Adding Vue
There are multiple ways to incorporate Vue into your Django project. In this article, we will be showing how you can add Vue to individual pages that need it.
Setting Up Your Vue App
We will be using the Vue CLI to work with Vue.
- If you haven’t already installed the Vue CLI, install it by running
npm install -g @vue/cli. - After installing, create your Vue app by running
vue create app_name(I called my app “vue-games”): Your folder structure should now look like:
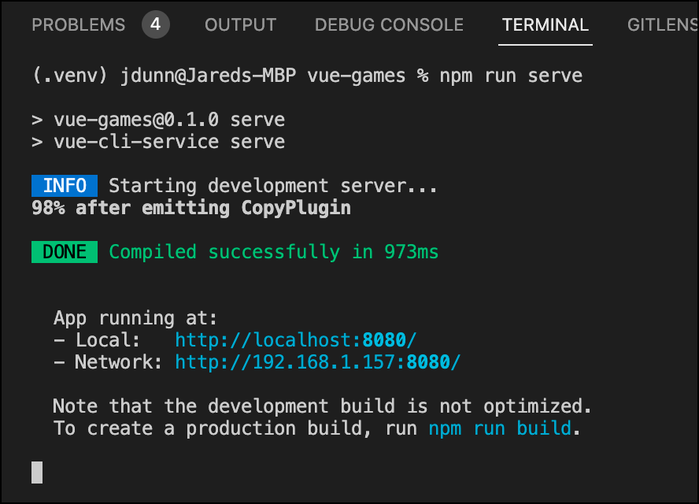
- You can run your Vue app by running
cd app_nameand thennpm run serve: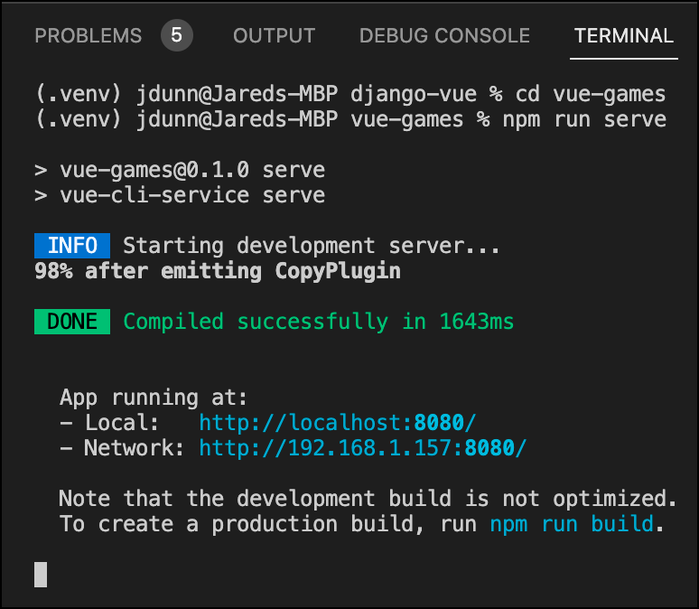
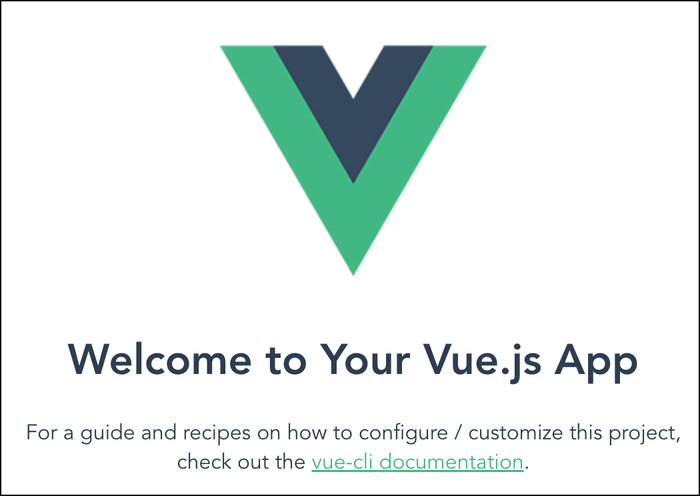
- Go to http://localhost:8080/ to view your app in the browser:
Right now, you can run both our Django project and our Vue app, but they run separately. We need to make it so our Vue app will run within our Django project.
Configuring Vue
By default, Vue outputs its code into the public/index.html file. We are going to change its configuration so that it outputs into a Django template instead. We will then be able to extend this template for any pages that we want to include Vue. Let’s get started:
- The first thing we will do is create Vue config file. Inside of vue-games, create a file called vue.config.js.
- Put the following code into vue.config.js:
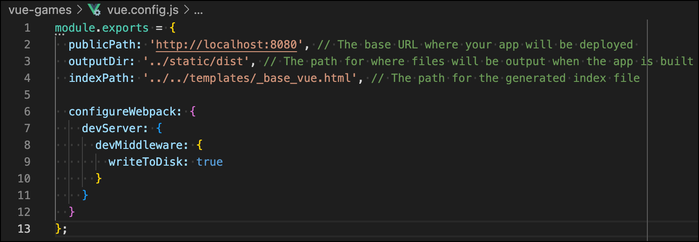 Here we have set the publicPath, the outputDir, and the indexPath. This configures where our app will be deployed (http://localhost:8080), where build files should go when we run
 npm run build(static/dist), and where our generated index file should go (templates/_base_vue.html). We also configure the dev server to output our index.html into its file (writeToDisk) rather than preserve it in memory. This allows our Django to access it. - Create a static folder at the same level as games and then create a dist folder inside of it. When you build the app with
npm run buildfor deployment, this is where the app files will go. - Open djangovue_project/settings.py and right below
STATIC_URL = 'static/'add the following:STATICFILES_DIRS = [ BASE_DIR / 'static', ]This lets Django know where to find your static folder. - We need to make some updates to our templates/_base.html so that our _base_vue.html can properly extend it:
- Now open vue-games/public/index.html. We are going to convert this into a Django template because Vue draws from this file to create the index file used to render Vue apps:
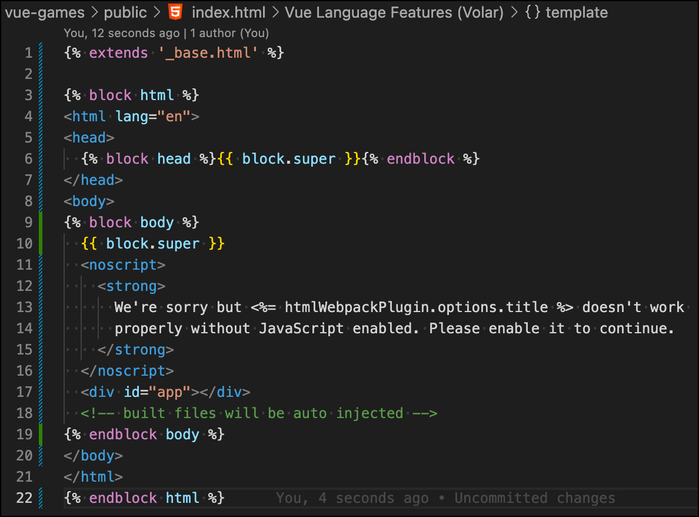 Notice
 {{ block.super }}, which indicates that the content from the extended template block should be used there. - Change math-game.html and anagram-game.html to extend _base_vue.html instead of _base.html.

At this point, you can run both servers (in two separate terminals) and you should see that Vue is included on both game pages: 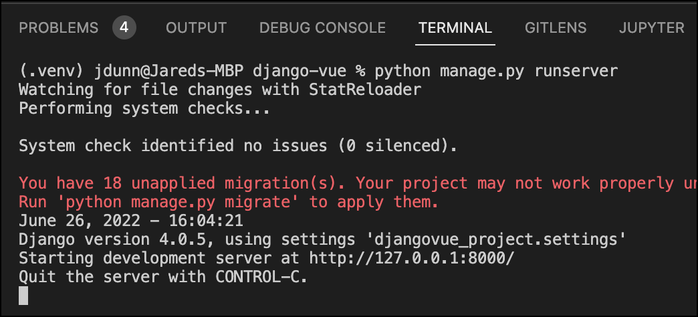
However, notice that both the Math Game and the Anagram Game pages show the same Vue page. We want different Vue pages for each game. To set this up we are going to use Vue Router:
- You can stop both servers if you still have them running.
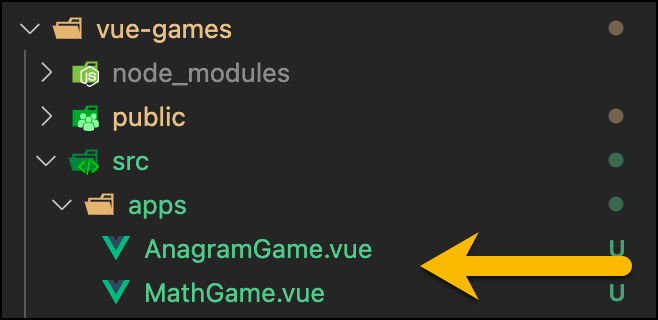
- Inside of vue-games/src create a new folder called apps.
- Inside of apps create two new Vue files: MathGame.vue and AnagramGame.vue:
- In each of these files, you can add a very simple
template. Something like: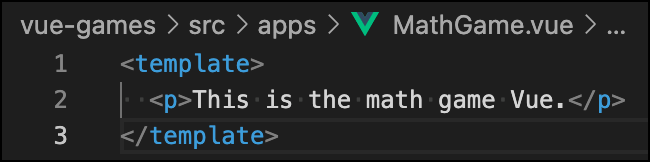
- Now, open the terminal at the vue-games folder and run
npm install vue-router@4to install Vue Router in your Vue project.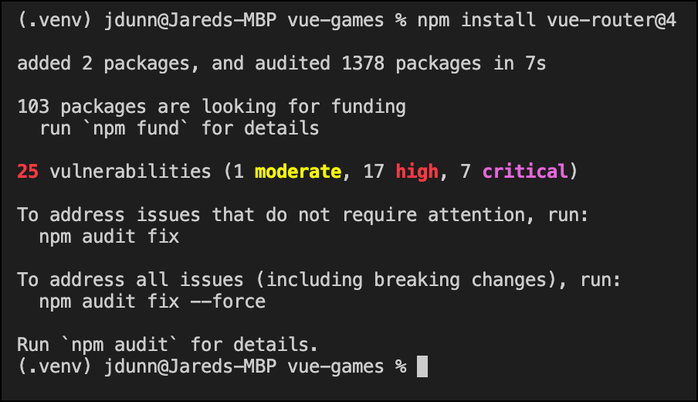
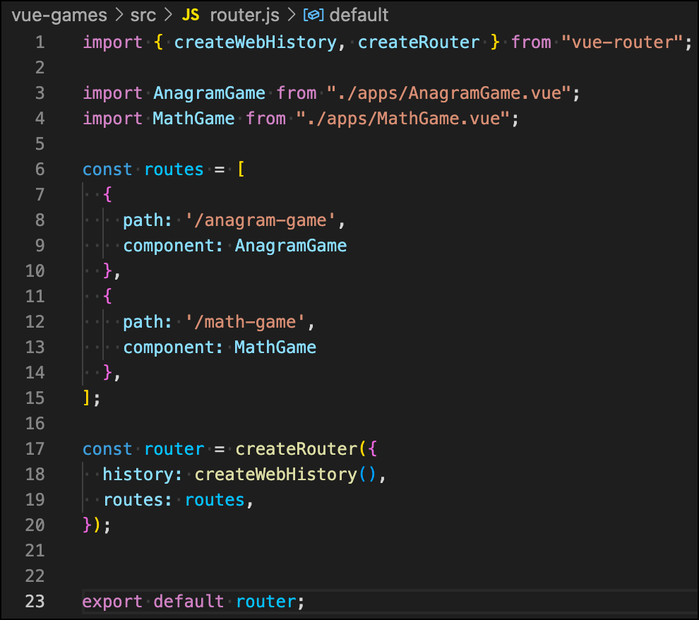
- Inside of vue-games/src create a new file called router.js.
- Open router.js and write the following code to set up routes to your two apps:
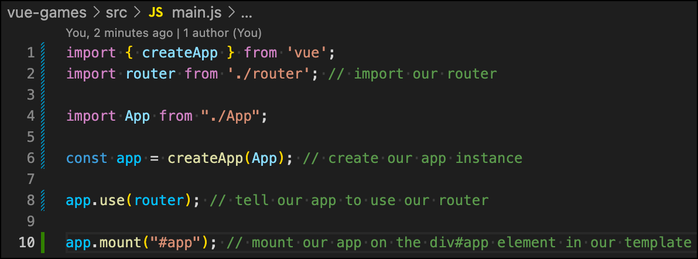
- Now open vue-games/src/main.js. We need to import our router so that Vue knows to use it:
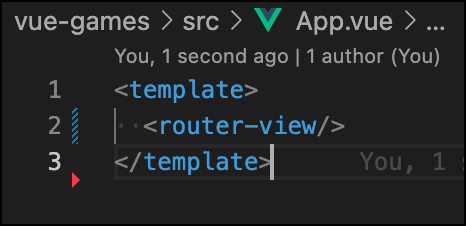
- Lastly, we need to update the contents of App.vue so that it knows to use our router as well:
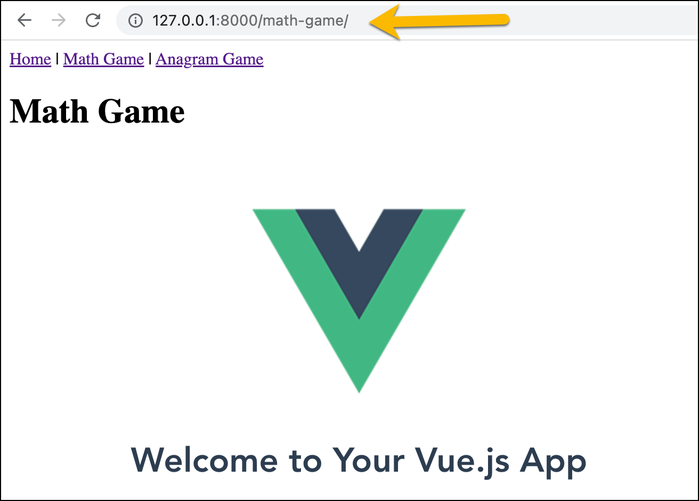
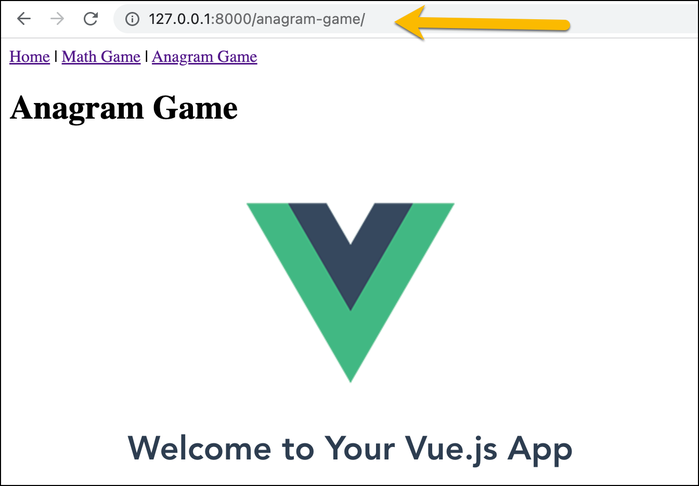
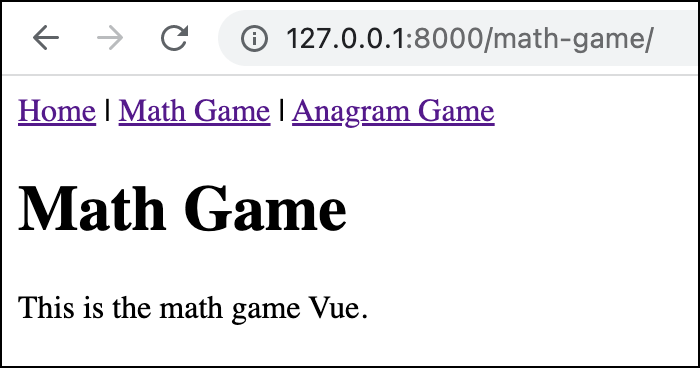
Now if you run the servers, you will be able to see our page-specific Vue for http://127.0.0.1:8000/anagram-game/ and http://127.0.0.1:8000/math-game/: 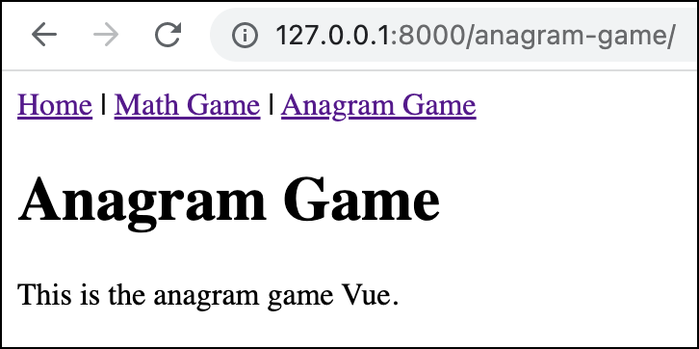
Communicating Between Vue and Django
In order to fully take advantage of our Vue frontend, we need to be able to communicate to our Django backend. For this example, we will create extremely simplified versions of the Vue games that will update scores on the backend.
Creating the Django Model
So far, we haven't created any Django models, which represent how we store our data. We'll create a single GameScore model to store game scores, for which game the score was for, the name of the user who got the score, and the time the score was achieved:
- Open up games/models.py.
- Add the following code to add our four fields:
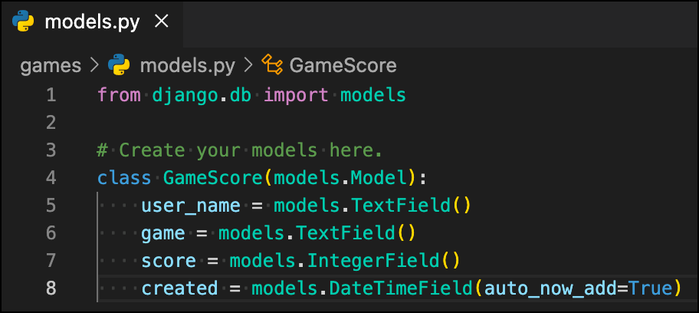 Note that
 auto_now_add=Truemakes ourcreateddate field automatically be assigned to the current date and time when a new game score is added. - Open the terminal and run
python manage.py makemigrationsto make a new migration file for our database:
- Now run
python manage.py migrateto add our model (as well as all the default models) to the database: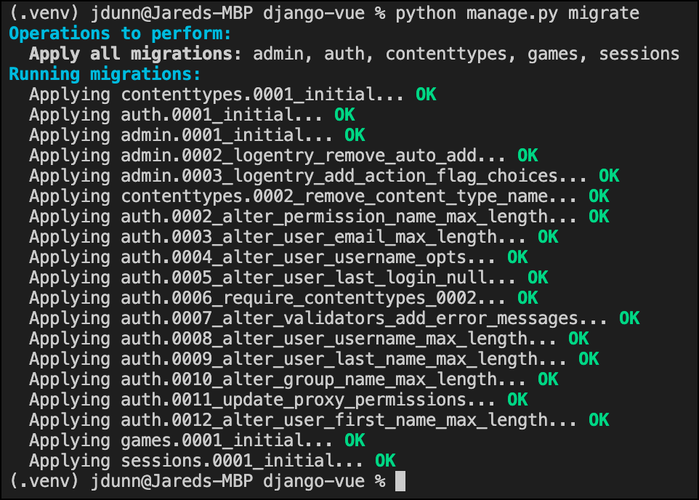
- We successfully created our GameScore model, but let's make one small improvement. Currently, our
gamefield is just a plain text field. Let's use the choices option to make it so,gamecan only be "MATH" or "ANAGRAM". Change games/models.py so thatgameuseschoices: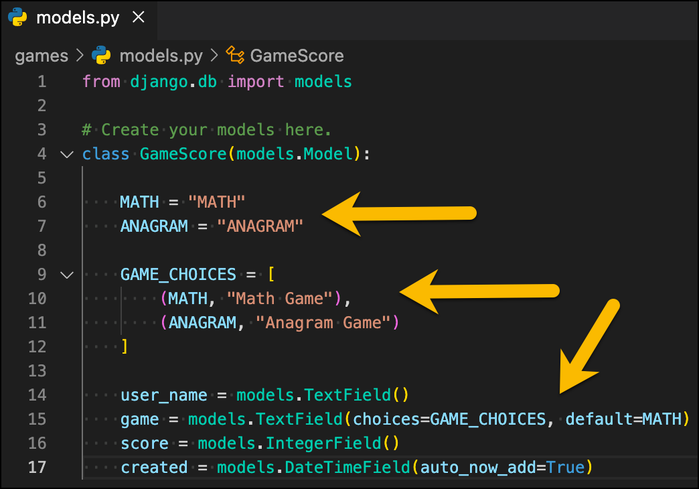
- Now run
python manage.py makemigrationsandpython manage.py migrateto update the database: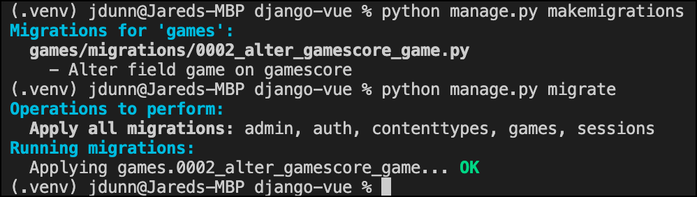
Awesome! In order for Vue to update Django, we need a URL that it can post to. To set that up, we need a new Django view and URL.
Creating the Django View and URL
- Open up games/views.py.
- At the top of the file, add the following lines to import
jsonandJsonResponse:import json from django.http import JsonResponse from games.models import GameScore
- Add a new function view called
record_score: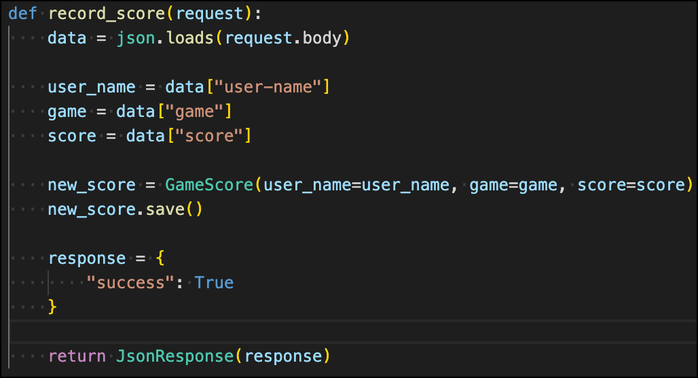 This function view takes in a request, reads data from its body, creates a new
 GameScoreinstance with that data, and then returns a simple json response. - Open up games/urls.py.
- Import
record_datafromgames.views. - Add a new URL path that points to the
record_scorefunction: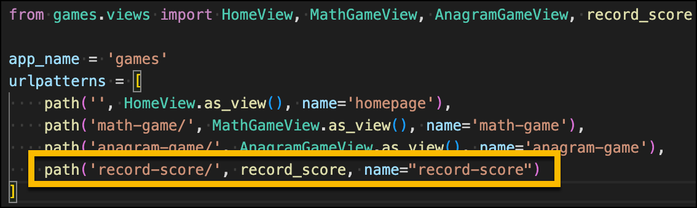
Great! we have created a URL you can post to from your frontend to save a game score. Now let's update our Vue games so we can submit scores. To do this, we need to us Ajax.
Ajax and Vue
Ajax is a way for JavaScript in the frontend to communicate with the backend without refreshing the page. This is provided out of the box with the fetch() method or XMLHttpRequest, however there are additional libraries that can make this process even easier. I prefer axios.
Let's look at how to enable submitting game scores with Vue and axios!
- Open the terminal at vue-games and run
npm install --save axios vue-axios. This installs axios and vue-axios, which is an additional library making it even easier to use axios with Vue. - Open vue-games/src/main.js.
- At the top of the file import axios and vue-axios like this:
import axios from 'axios';
import VueAxios from 'vue-axios';
- Then, after the line where we have
app.use(router);, we can addapp.use(VueAxios, axios);:
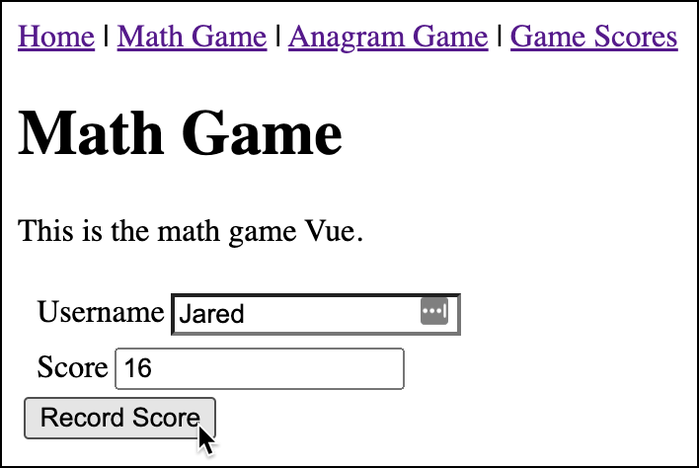
- Now, let's open our Math Game component (vue-games/src/apps/MathGame.vue) to update the template:
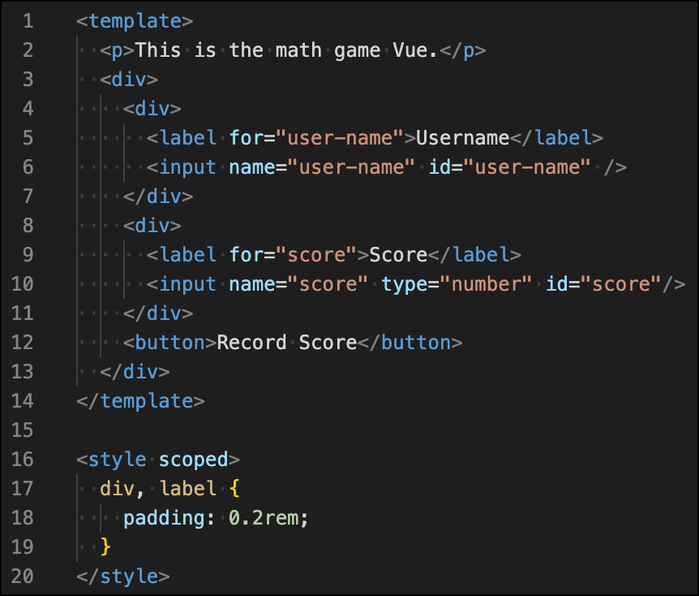 Here, we've added two inputs (a text input for username and a number input for score) and a button to record the score. The
 styleelement contains some styles to add a little bit of spacing: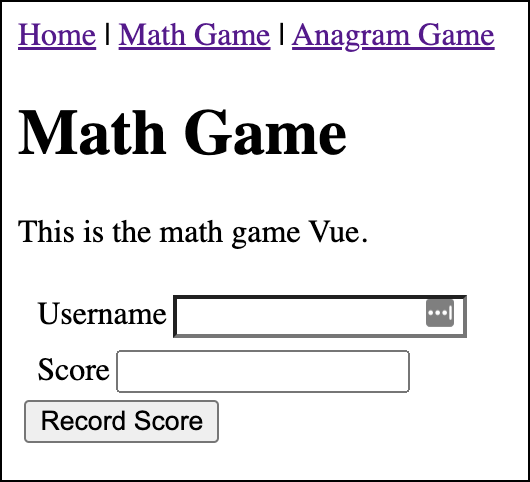
- Now, we need to add a
scripttag to add functionality: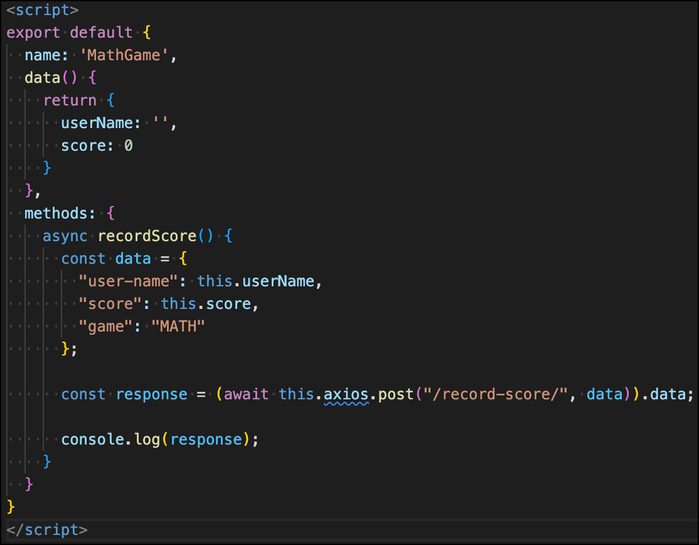 The most important pieces here are:
- The two
datavariables we've added to track the user name and score values (userName,score). We will connect these variables to our inputs in just a second. - The
recordScoremethod, which is an asynchronous (async) function usingaxiosto send our user name and score data to the backend. Notice that we are also sendingMATHfor the game value because we need to indicate which game the score is for.
- The two
- We can use
v-modeland@clickto connect our data to the inputs and make sure that we callrecordDatawhen the button is clicked.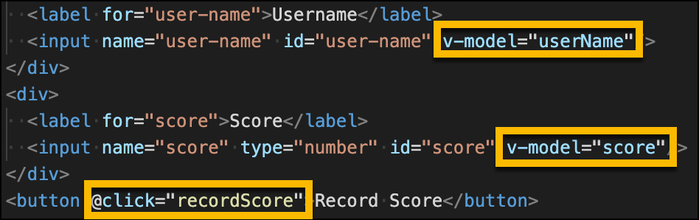
- It seems like we set up everything correctly to post to the URL, but if we go to the browser right now and try to submit a score, we will get an error:
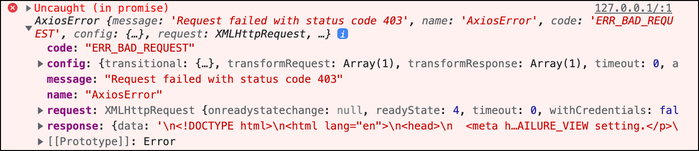 This is a Cross Site Request Forgery error and it is a safety precaution to prevent bad actors to write code that posts to our server from other websites.
 - To fix this error, we need to do two things:
- Open templates/_base_vue.html and add
{% csrf_token %}right above the{% endblock body %}tag. We will now be able to access this token to verify that our requests are coming from a website that we control. - Open vue-games/src/main.js again and add the following above
const app = createApp(App);:axios.defaults.xsrfCookieName = 'csrftoken'; axios.defaults.xsrfHeaderName = "X-CSRFTOKEN";
This code tells axios to include the CSRF token value with every request automatically. This means we don't need to add it for each request, which could get cumbersome.

- Open templates/_base_vue.html and add
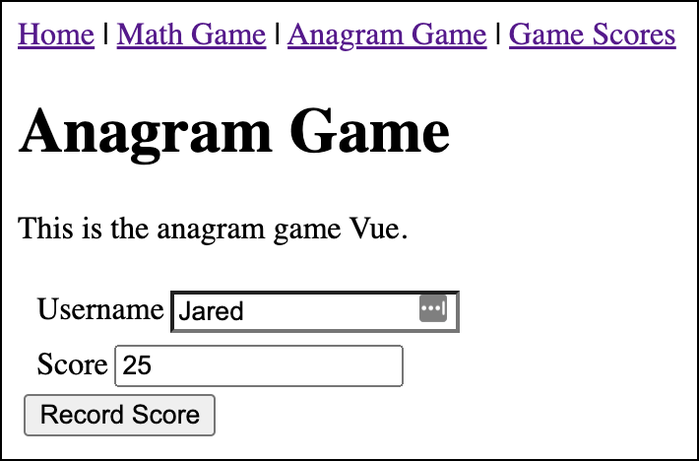
- Lastly, you can copy and paste the vue-games/src/apps/MathGame.vue code into vue-games/src/AnagramGame.vue to get the Anagram Game working as well. Just make sure to replace
This is the math game VuewithThis is the anagram game Vue,name: 'MathGame'withname: 'AnagramGame', and"game": "MATH"with"game": "ANAGRAM".
Congratulations! You have communicated from your Vue frontend to your Django backend!
Display Scores (Bonus)
We have already done the heavy-lifting to connect and communicate between Django and Vue. As a bonus end to this mini project, let's create a page that list the game scores!
- Open games/views.py.
- Create a new class view called
GameScoreView. - Set
template_viewto "game-scores.html". - Create a new file called templates/games-scores.html.
- Add the following code to this file:
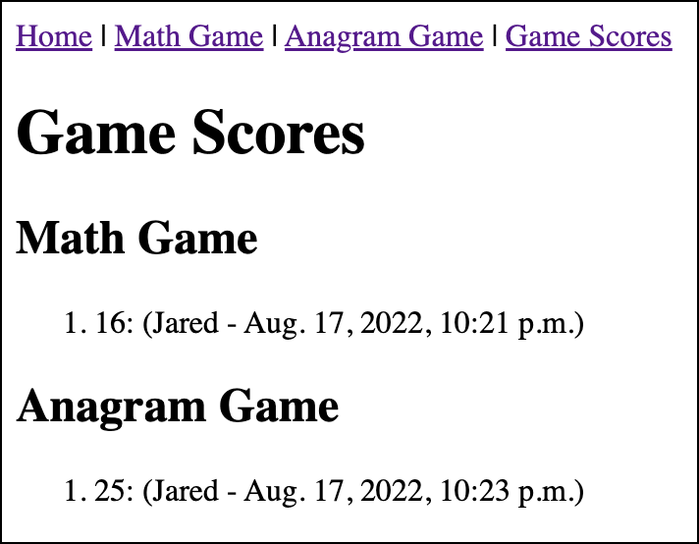
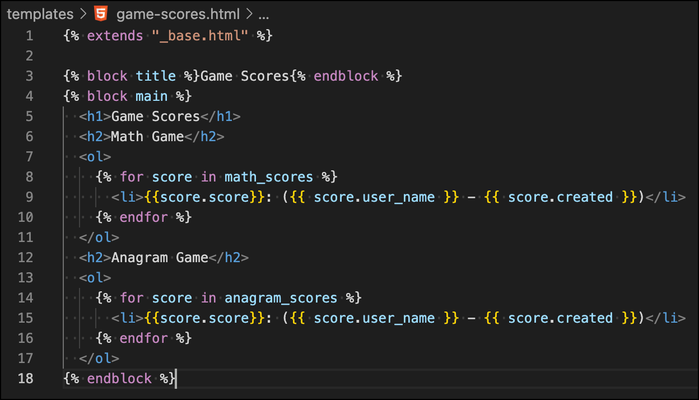 This code creates a lists for each game, making each game score entry appear in the following format:
score (user_name - created_date)
- Go back to games/views.py and add the following
get_context_datafunction inside of theGameScoresView:def get_context_data(self, **kwargs): context = super(GameScoresView, self).get_context_data(**kwargs) context['anagram_scores'] = GameScore.objects.filter(game__exact='ANAGRAM').order_by('-score') context['math_scores'] = GameScore.objects.filter(game__exact='MATH').order_by('-score') return contextThis function make theanagram_scoresandmath_scoresvariables accessible inside of the templates/game-scores.html template.filter(game__exact=[Game Type])is used to filter all the game score objects andorder_by('-score')is used to sort byscorein descending order (that's what the-does). In the end the view should look like: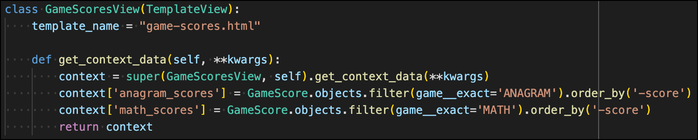
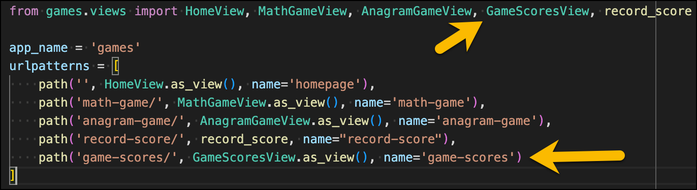
- Open games/urls.py and just like you've done before, import the new view and create a new path:
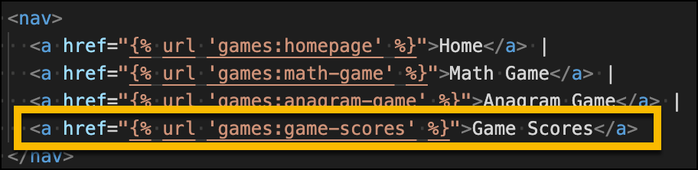
- Lastly, you can go to templates/_base.html and a new link in the header to the Game Scores page:
Woohoo! You're done! Now, test it out!
- Make sure both servers are running and go to your home page (http://127.0.0.1:8000/). You'll see the new link to the Game Scores page.
- Navigate to the Math Game page and add a score under your name:
- Do the same for the Anagram Game:
- Finally, check out the scores on the Game Scores page:
Conclusion
This article went through one way of integrating Vue into Django. I hope that you enjoyed it and found it helpful!
