Node.js and Node Package Manager (npm)
Node.js
Node.js is required for using many JavaScript tools and for creating server-side JavaScript applications. In this document, we show you how to check if Node.js is installed and to install it if it is not.
Node Package Manager (npm) is the default package manager for Node.js. It is used for installing, upgrading, configuring, and removing modules used by Node.js applications.
First, Check if Node and npm are Already Installed
- Open a terminal in Visual Studio Code by selecting Terminal > New Terminal.
- At the terminal, run
node -v:$ node -v v20.14.0 - If the version is 20 or higher of Node is installed and npm is also installed, you are all set with Node.js. If Node.js or npm is not installed or the version of Node.js is earlier than 20, you need to install them.
If Node.js is Not Installed Already or You Have an Old Version…
You need to install a new version of Node.js.
- Go to nodejs.org. Click the download button or link for the LTS (Long Term Support) version.
- When the file finishes downloading, locate it in your file system and double-click on it.
- Go through the entire installation process.
- When installation is complete, close the installer. Both Node and NPM will have been installed.
- Open Visual Studio Code.
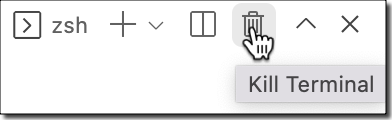
- If the Terminal is open, kill it by clicking on the trash can:
- Go to the top of this document and repeat the steps for opening a new terminal to confirm that you now have a new version of Node.js.
Related Articles
- A Step-by-Step Guide to Installing nvm-windows for Node.js Management
- Node.js and Node Package Manager (npm) (this article)